How To Create a Pass QR Code
A Pass QR code allows you to create digital tickets, store cards, event passes, or coupons that users can easily access and check into. This guide will show you how to generate a Pass QR code step-by-step, including check-in passwords and custom fields.
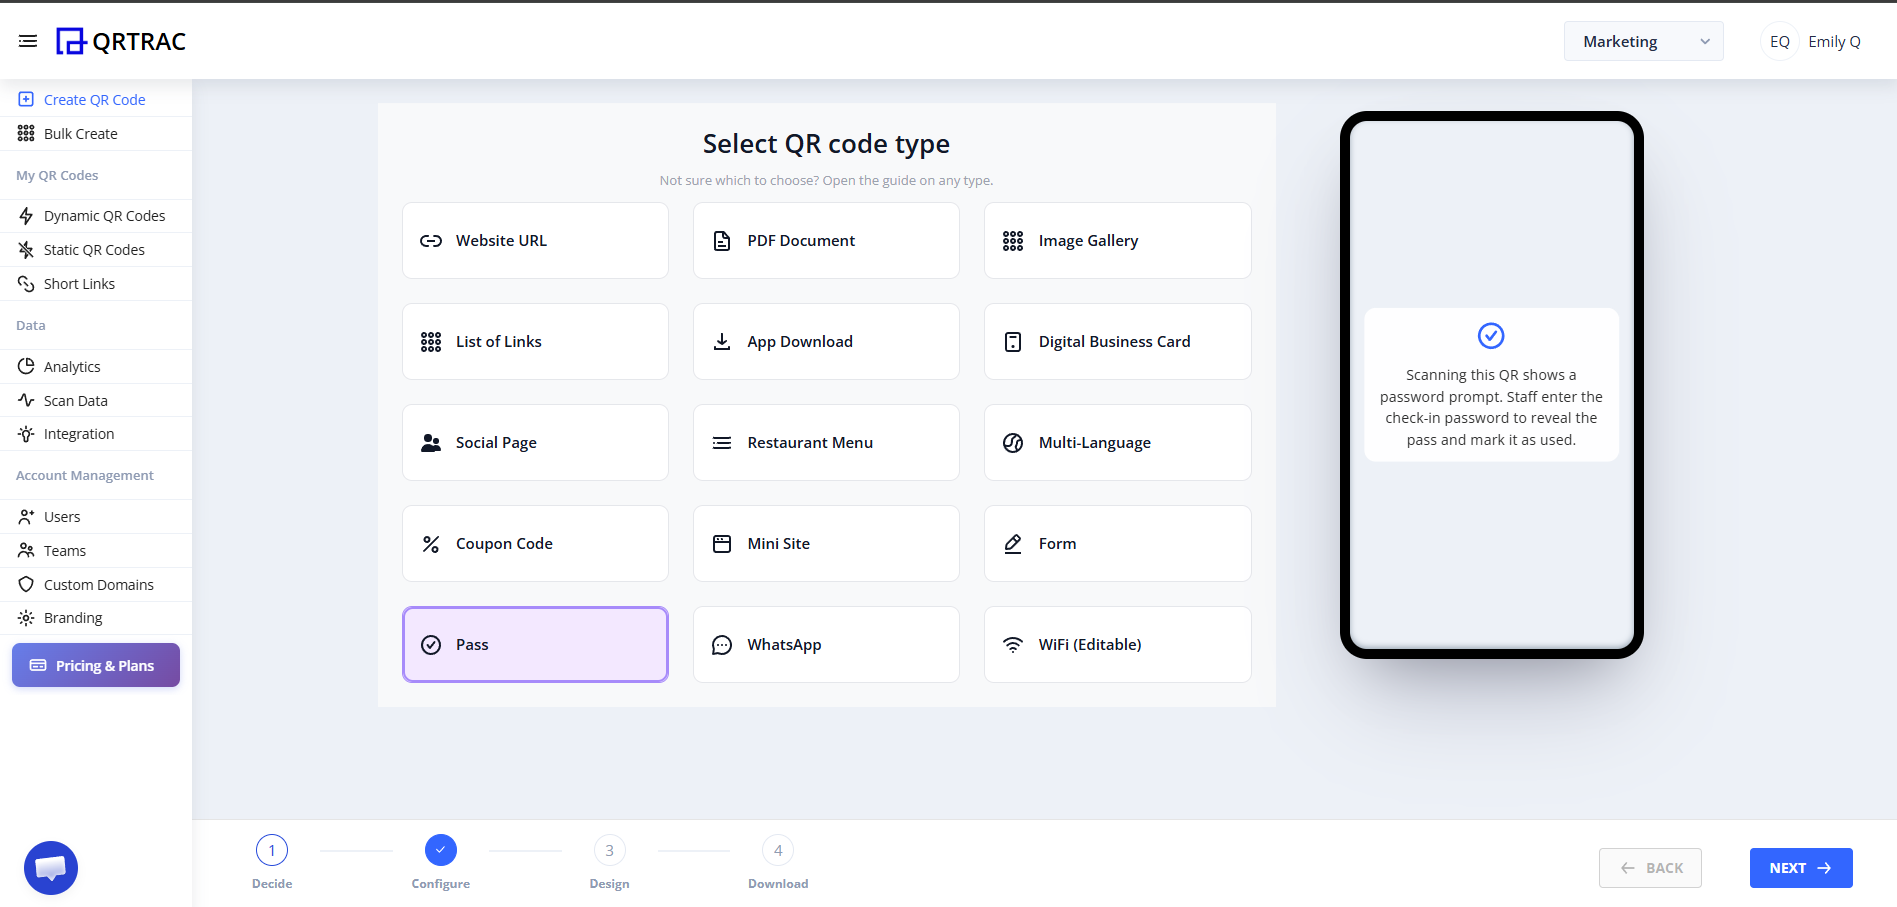
Step 1: Select "Pass" QR Type
- Log in to your QRTRAC dashboard.
- Click Create QR Code.
- From the available QR types, select the Pass option.
Step 2: Enter Pass Details
Fill in the fundamental information for your digital pass. This will be the main information your users see when they open the pass.
- Event Name: (e.g. Music Concert 2025)
- Date & Time: Provide the exact date and time.
- Venue: Enter the location details.

Step 3: Configure Check-in Settings
Pass QR codes include a secure check-in system so you can verify and mark passes as "used".
- Check-in Password: Enter the password that your staff will need to input to verify the pass.
- Auto Check-in: When enabled, simply entering the password marks the pass as checked in immediately (perfect for one-time use tickets).
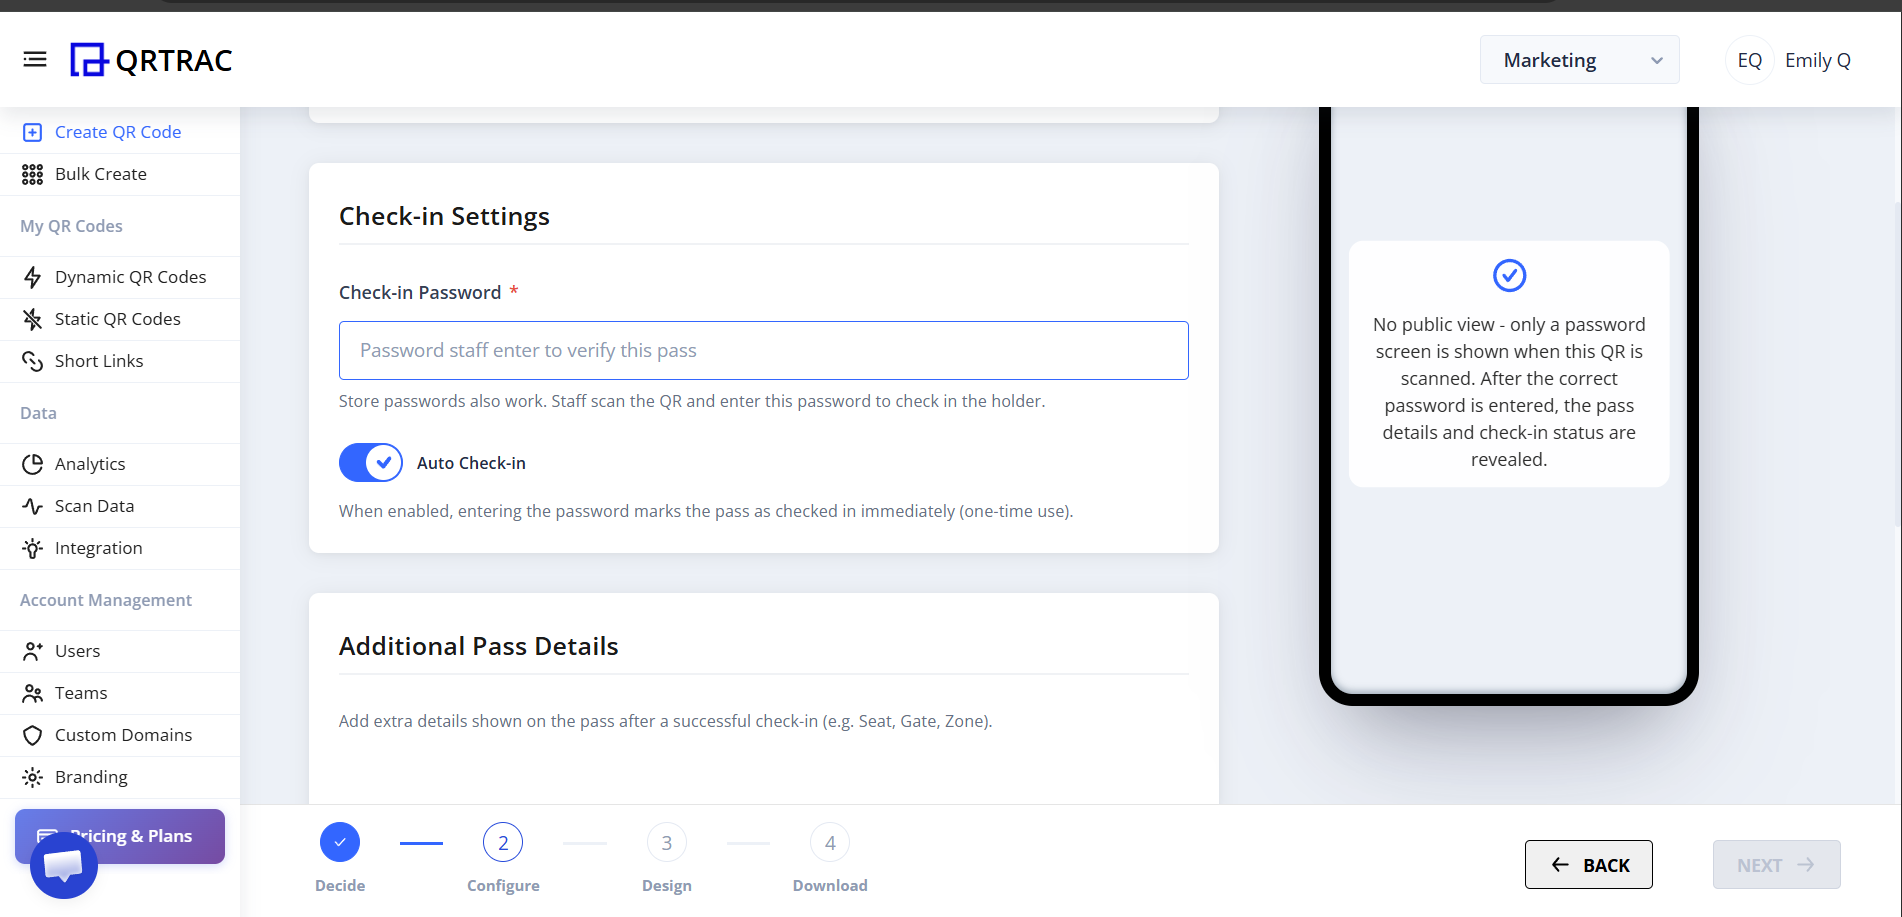
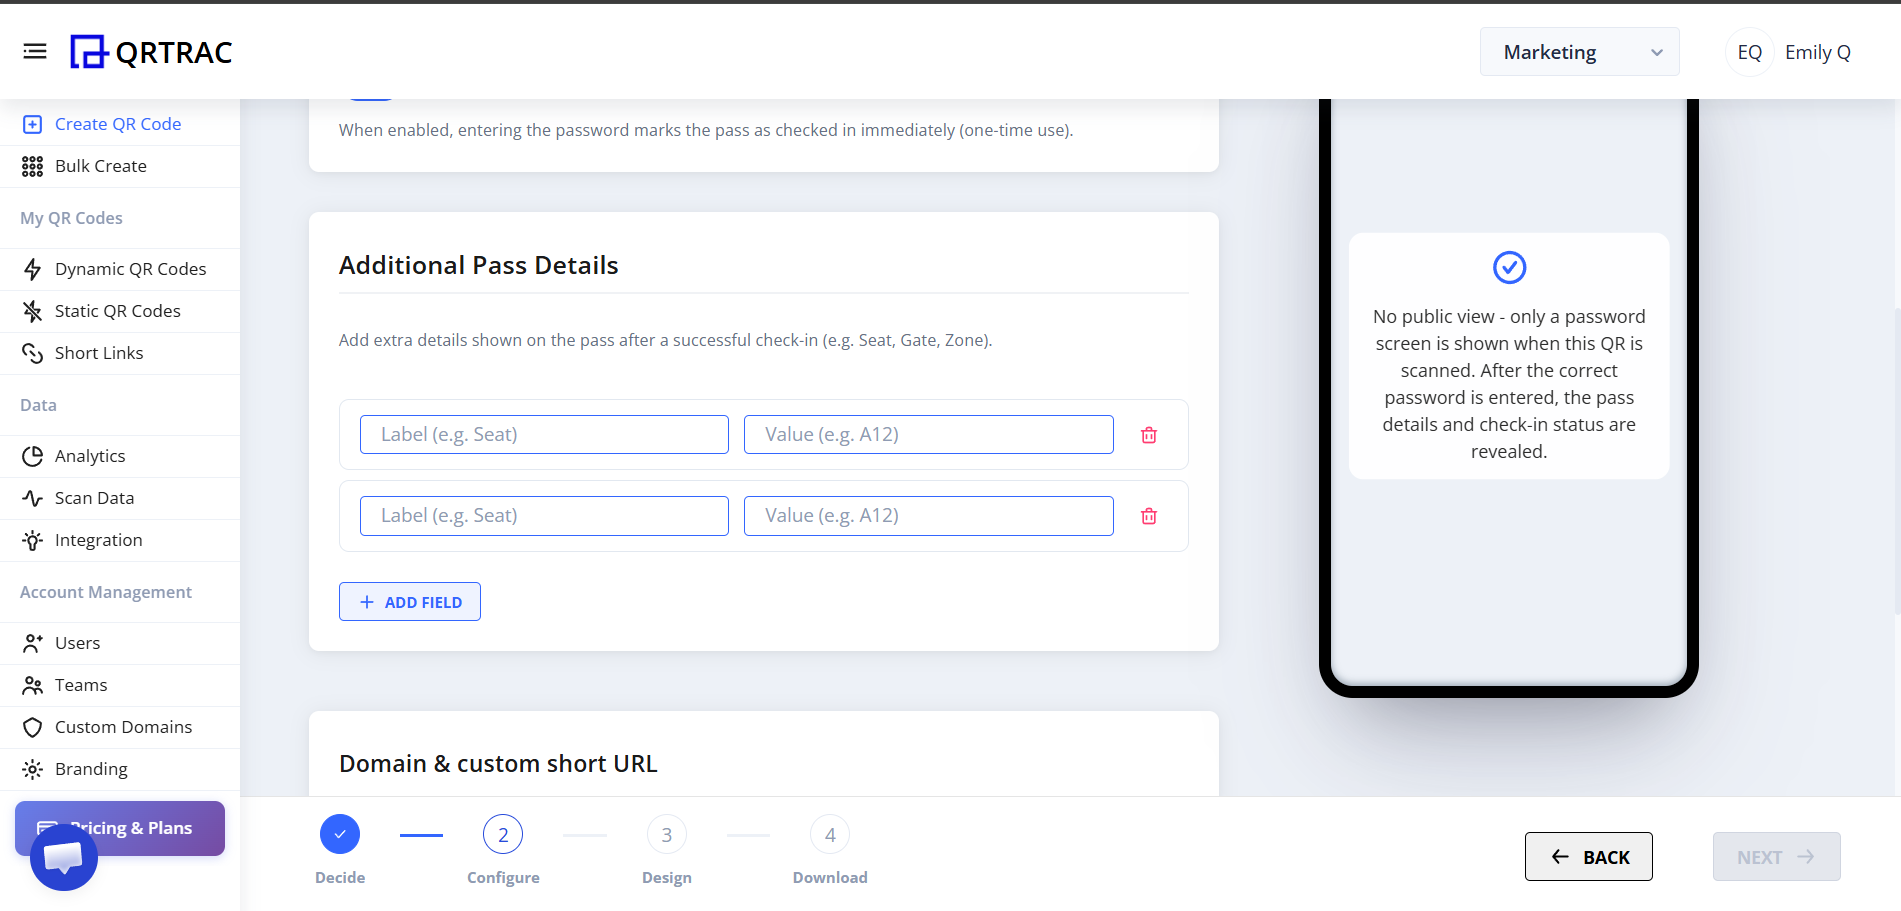
Step 4: Add Additional Pass Details
If you need to show extra information (like seat numbers, zones, or gate assignments) after a successful check-in, you can add them here using key-value fields.
- Label: e.g., Seat
- Value: e.g., A12
You can click + Add Field for as many rows as you need.
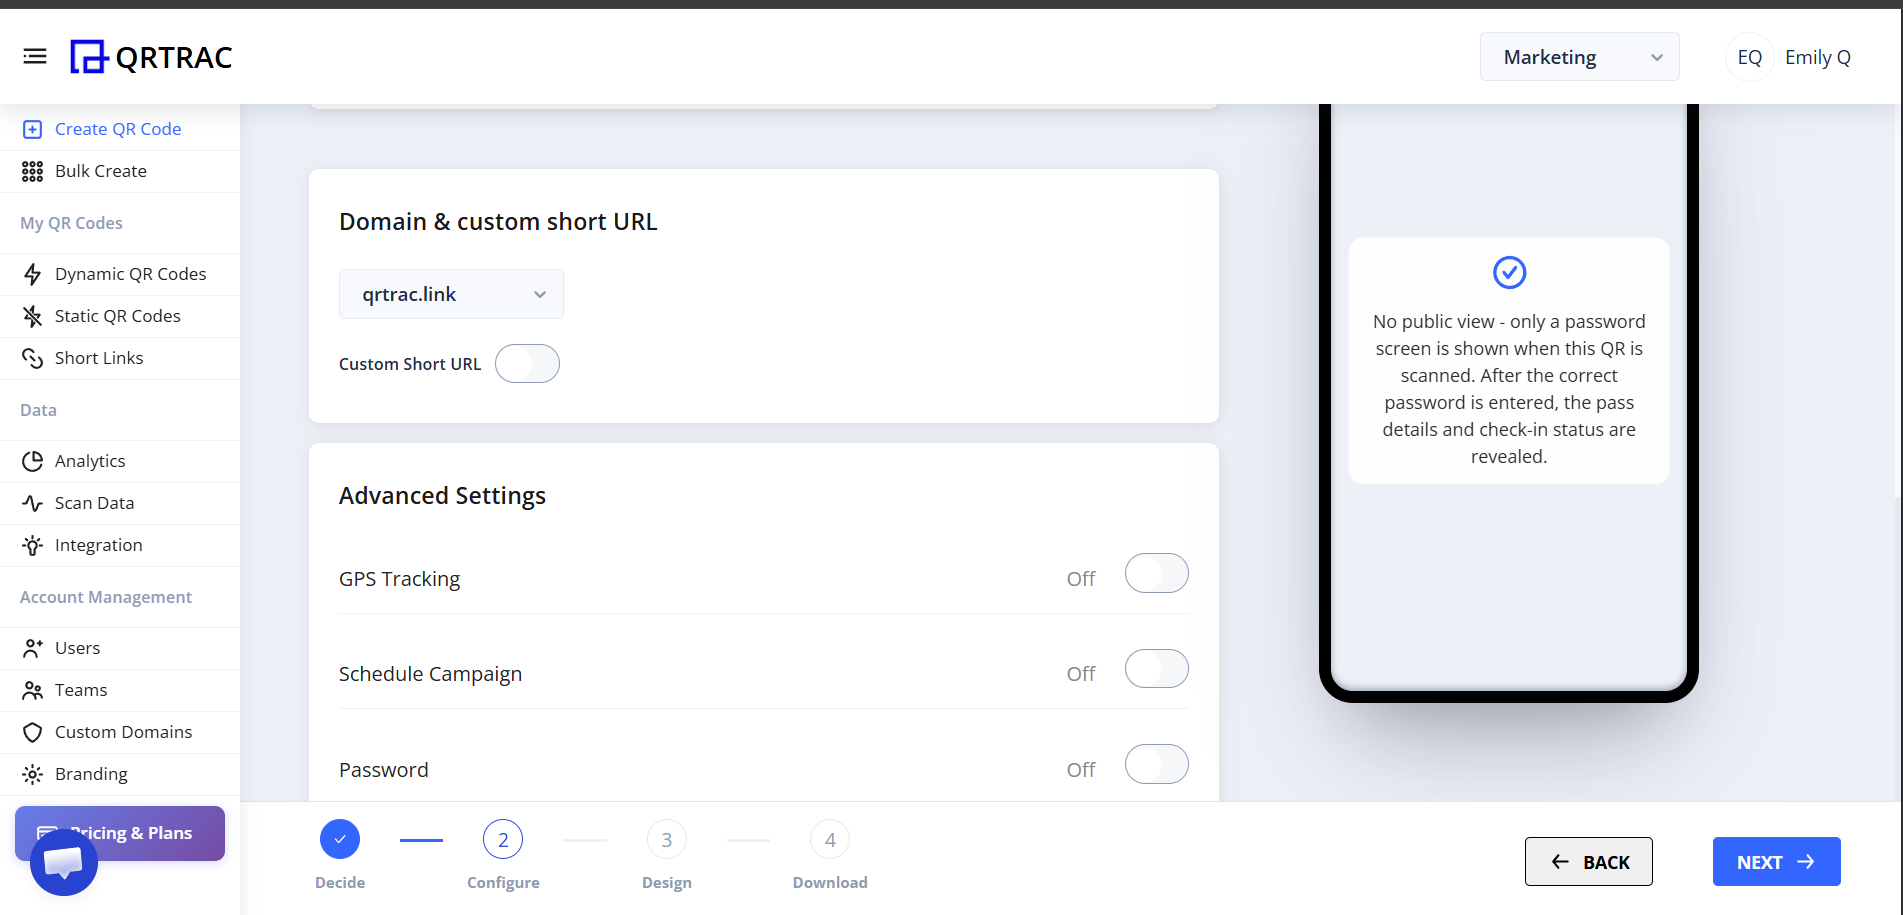
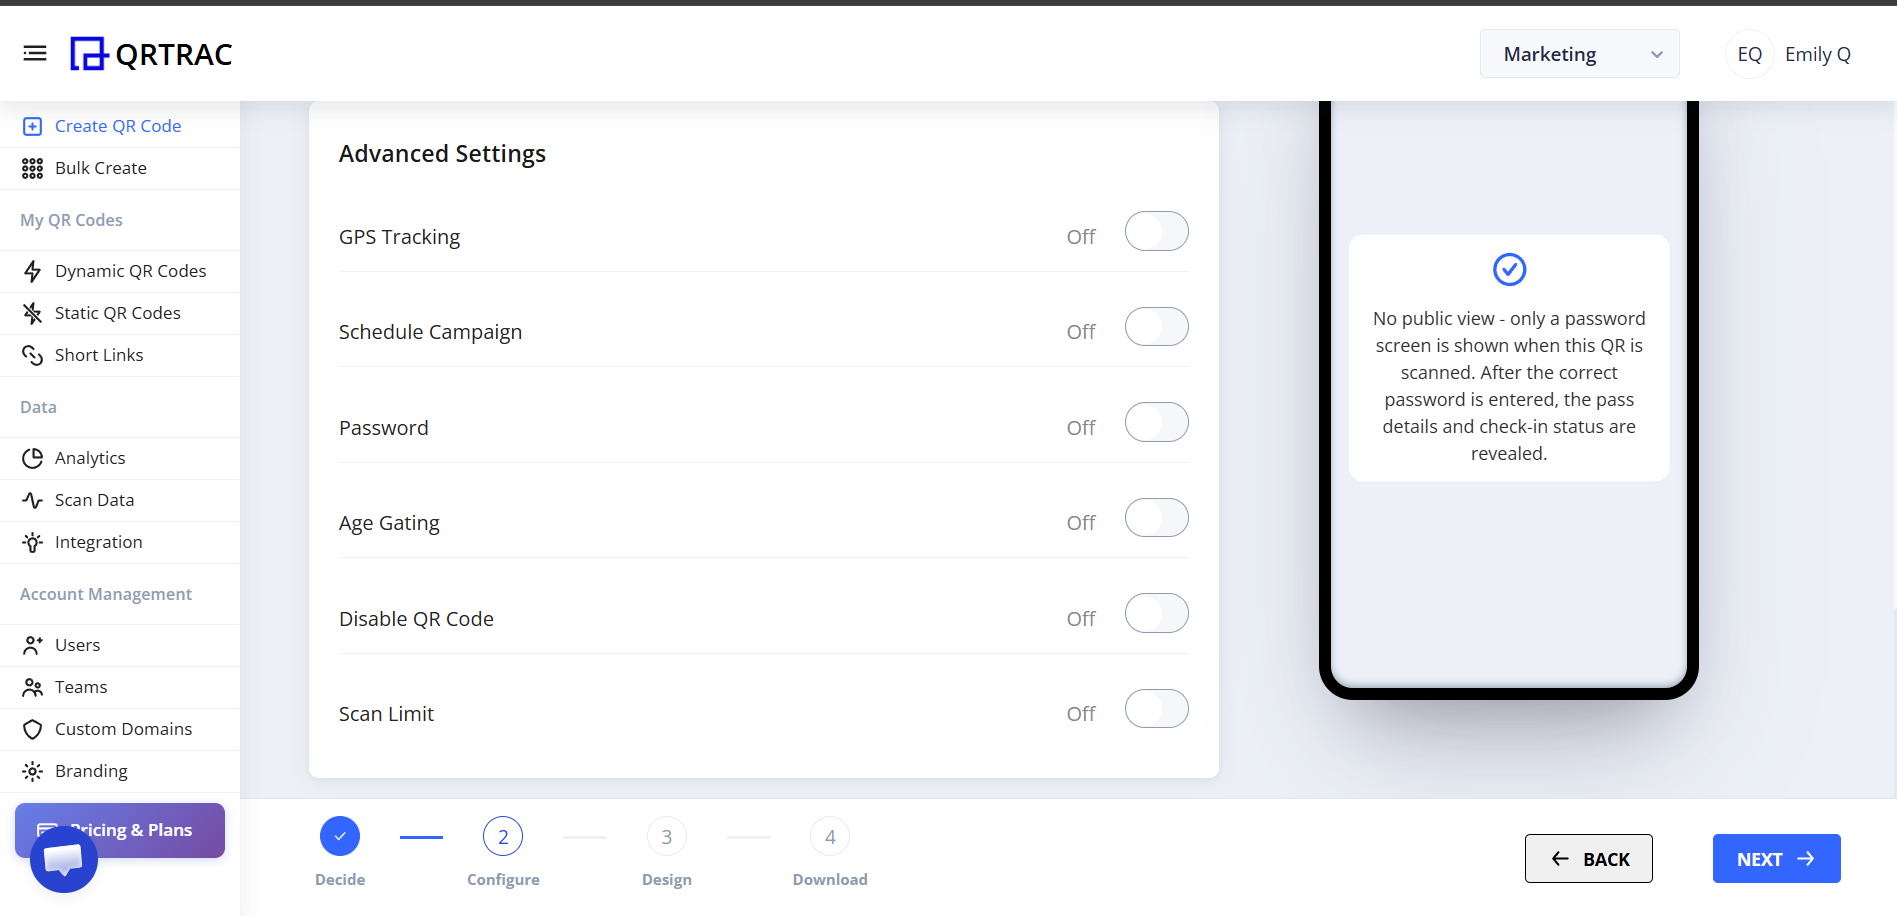
Step 5: Domain & Advanced Settings
Customize the short URL that hosts your pass and configure advanced behavior if necessary.
- Custom Short URL: Select your preferred domain and toggle the custom URL option.
- Advanced Settings: Here you can enable options like GPS Tracking, Schedule Campaign (so the pass only works during specific dates), or set a Scan Limit.
Double Check Your Data
Make sure all event times, dates, and locations are correct before generating the pass.
Step 6: Design Your QR Code
Customize the look of your QR code by changing colors, adding your logo, and selecting eye and pattern shapes. You can also save your design as a template for future use.

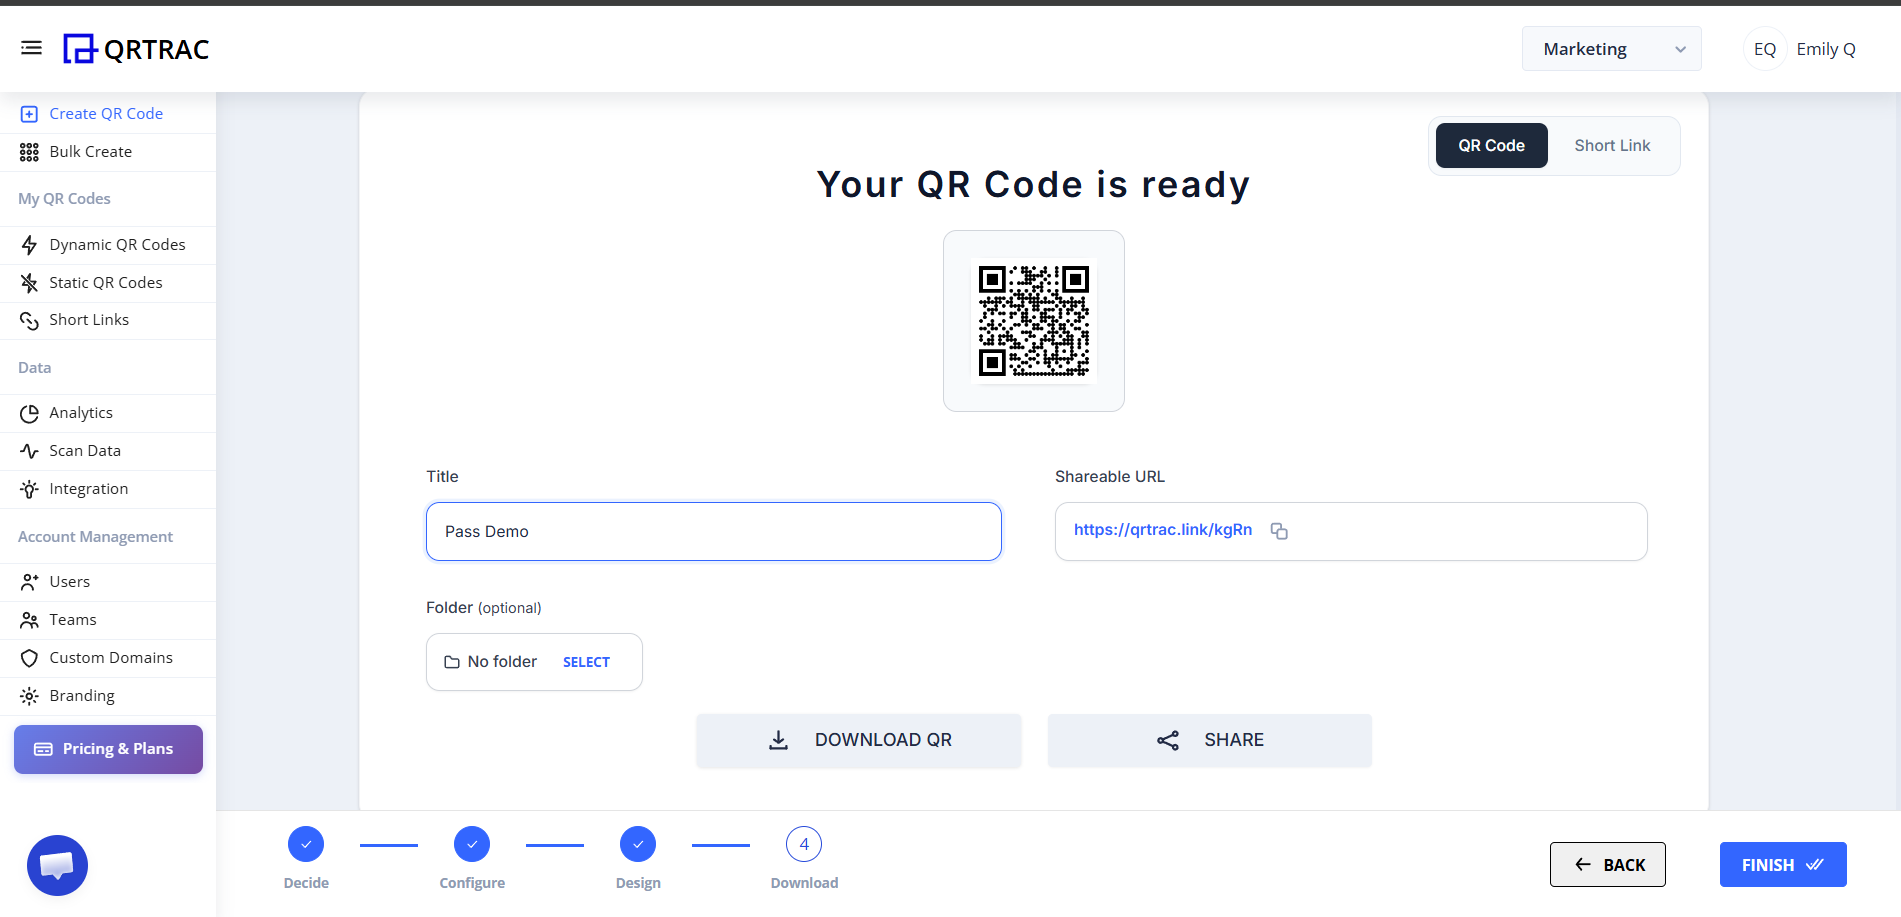
Step 7: Finalize and Download
Once you click Next, your QR code is ready.
- Give your QR code a Title (e.g., "Pass Demo") and optionally assign it to a folder.
- Click Download QR.
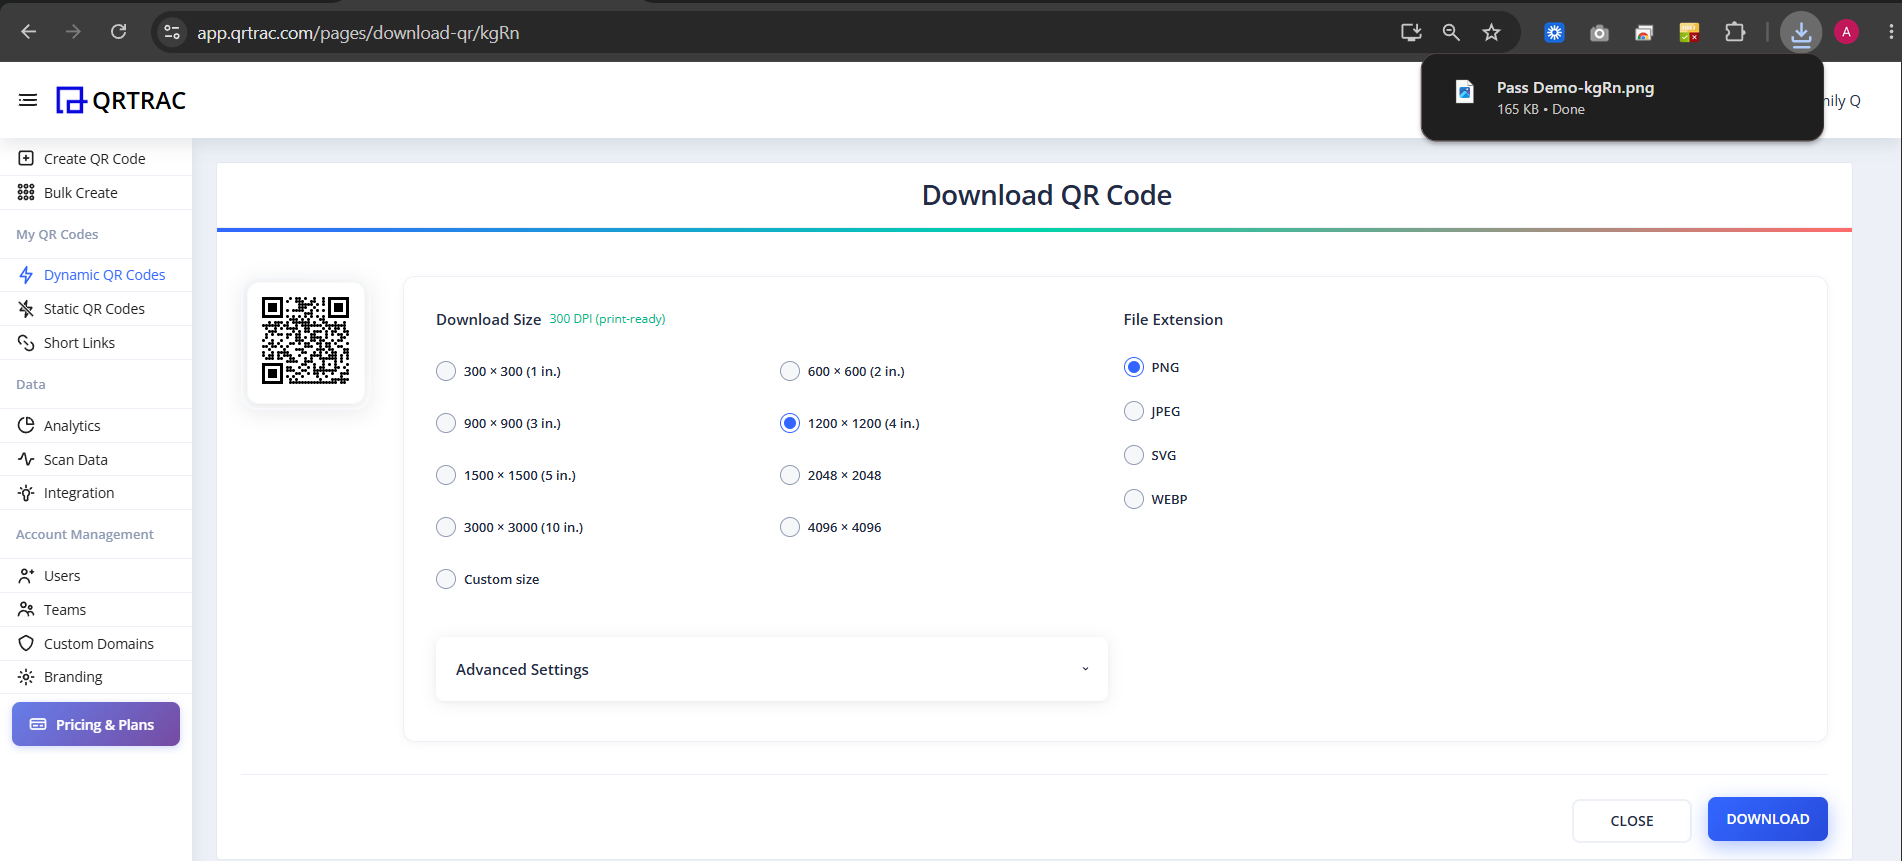
- Choose your preferred Download Size (e.g., 1200 x 1200) and File Extension (PNG, JPEG, SVG, or WEBP).
- Click the final Download button.
Tip: Always test your QR code by scanning it with a smartphone camera directly from your monitor before printing.
Frequently Asked Questions
Can I update pass details after printing the QR code?
Yes. Because these are Dynamic QR codes, you can modify the event details, venue, or check-in password at any time from your dashboard.
How does the check-in system work?
When the user's Pass QR code is scanned, the scanner will see a prompt requesting the Check-in Password. Once your staff enters the correct password, the full details (like Seat or Gate number) are revealed and the pass can be marked as used.