Managing Users
The Users page shows every member in your QRTRAC organisation. From here you can add new users, assign them to teams, set their role, and control what they can access — all without leaving the dashboard.
How do I add a new user?
- Click Users in the left sidebar under Account Management.
- Click + Add User Fast in the top-right corner.
- Enter the user's full name and email address.
- Optionally assign a team and role using the Add Team section.
- Click Save User to create the account.
Step 1: Open the Users Page
Click Users in the left sidebar under the Account Management section. The page displays a table of all users in your organisation, showing:
- Name — the user's full name
- Email — their login email address
- Role — their access level (Owner, Admin, Member, or Viewer)
- Team — the team(s) they are assigned to
- Status — whether their account is Active or pending
- Actions — edit or remove the user
Use the Search by name or email field to quickly find a specific user, or use the Filter by team dropdown to narrow the list to one team.
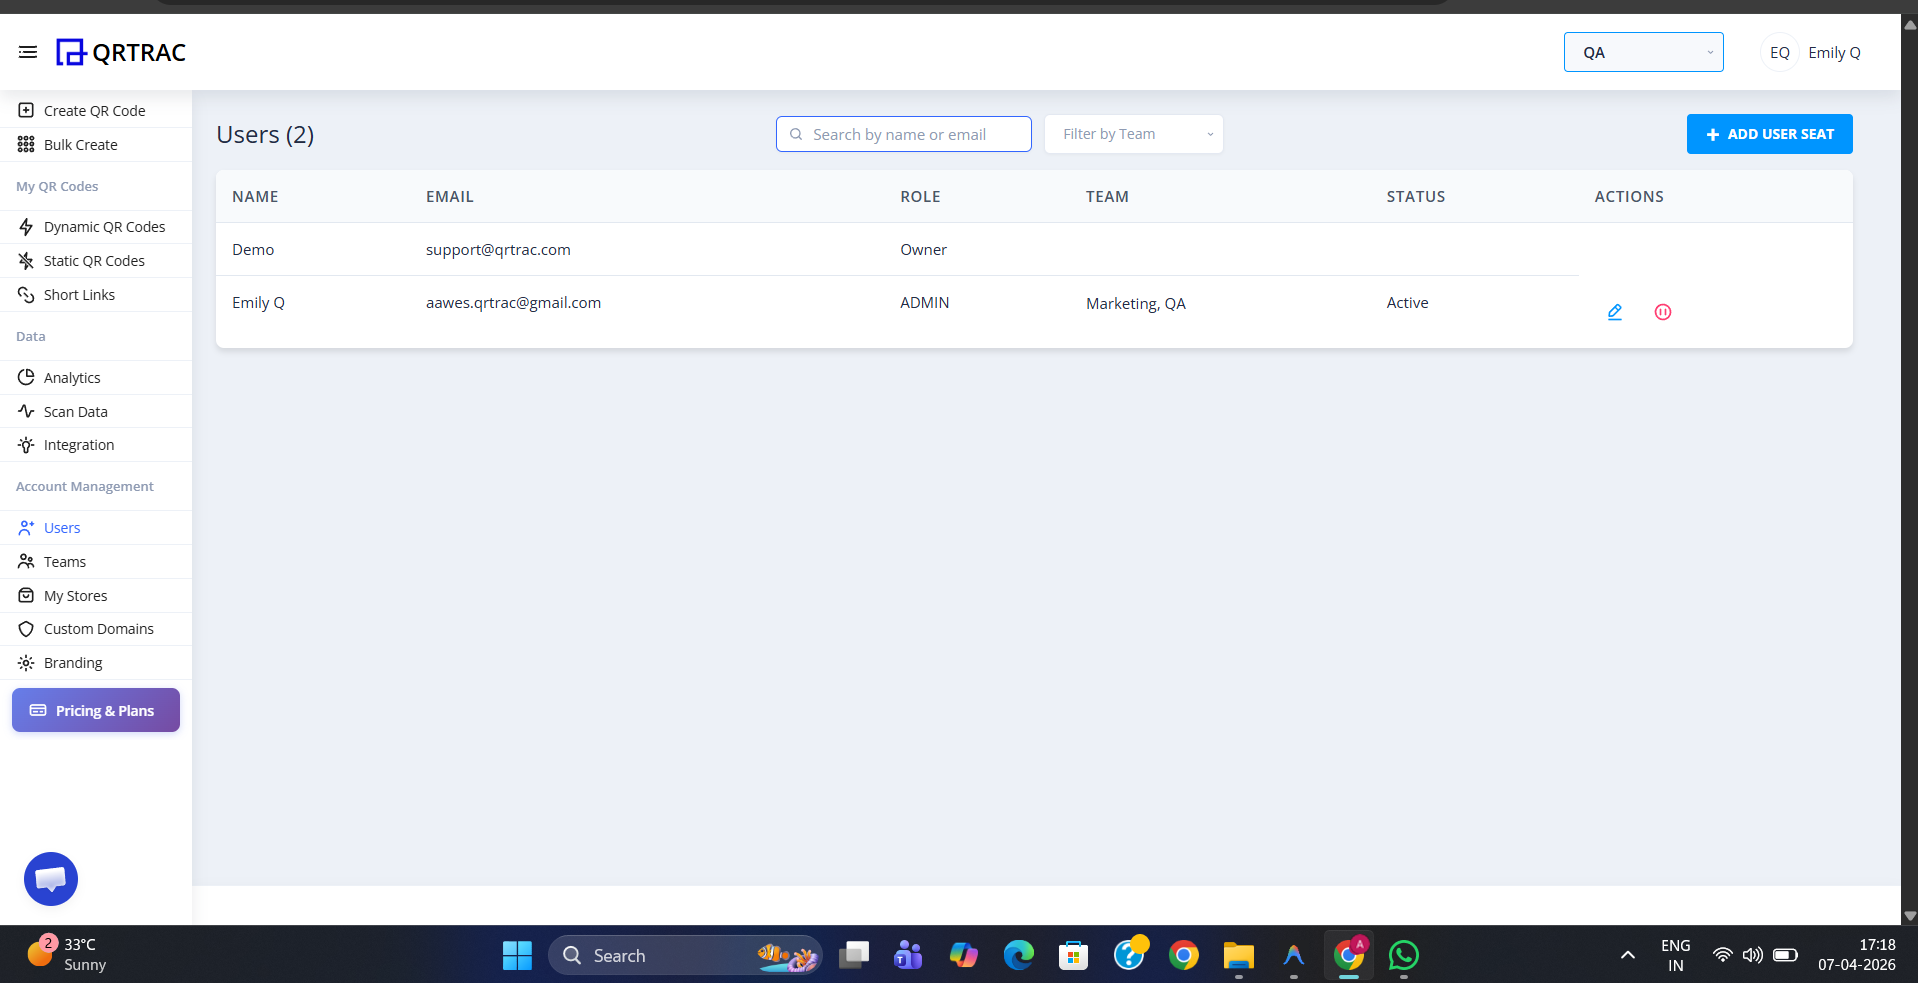
The Users page — all organisation members listed with their role, team, and status
Step 2: Understanding User Roles
Each user is assigned a role that controls what they can do in QRTRAC. The available roles are shown at the bottom of the Add New User form:
Full access to create teams, add members, update roles, create/edit/delete QR codes, make payments, and add custom domains.
Can create and manage QR codes within their assigned teams. Cannot manage users, billing, or organisation settings.
Read-only access. Can view QR codes and analytics in their assigned teams but cannot create or edit anything.
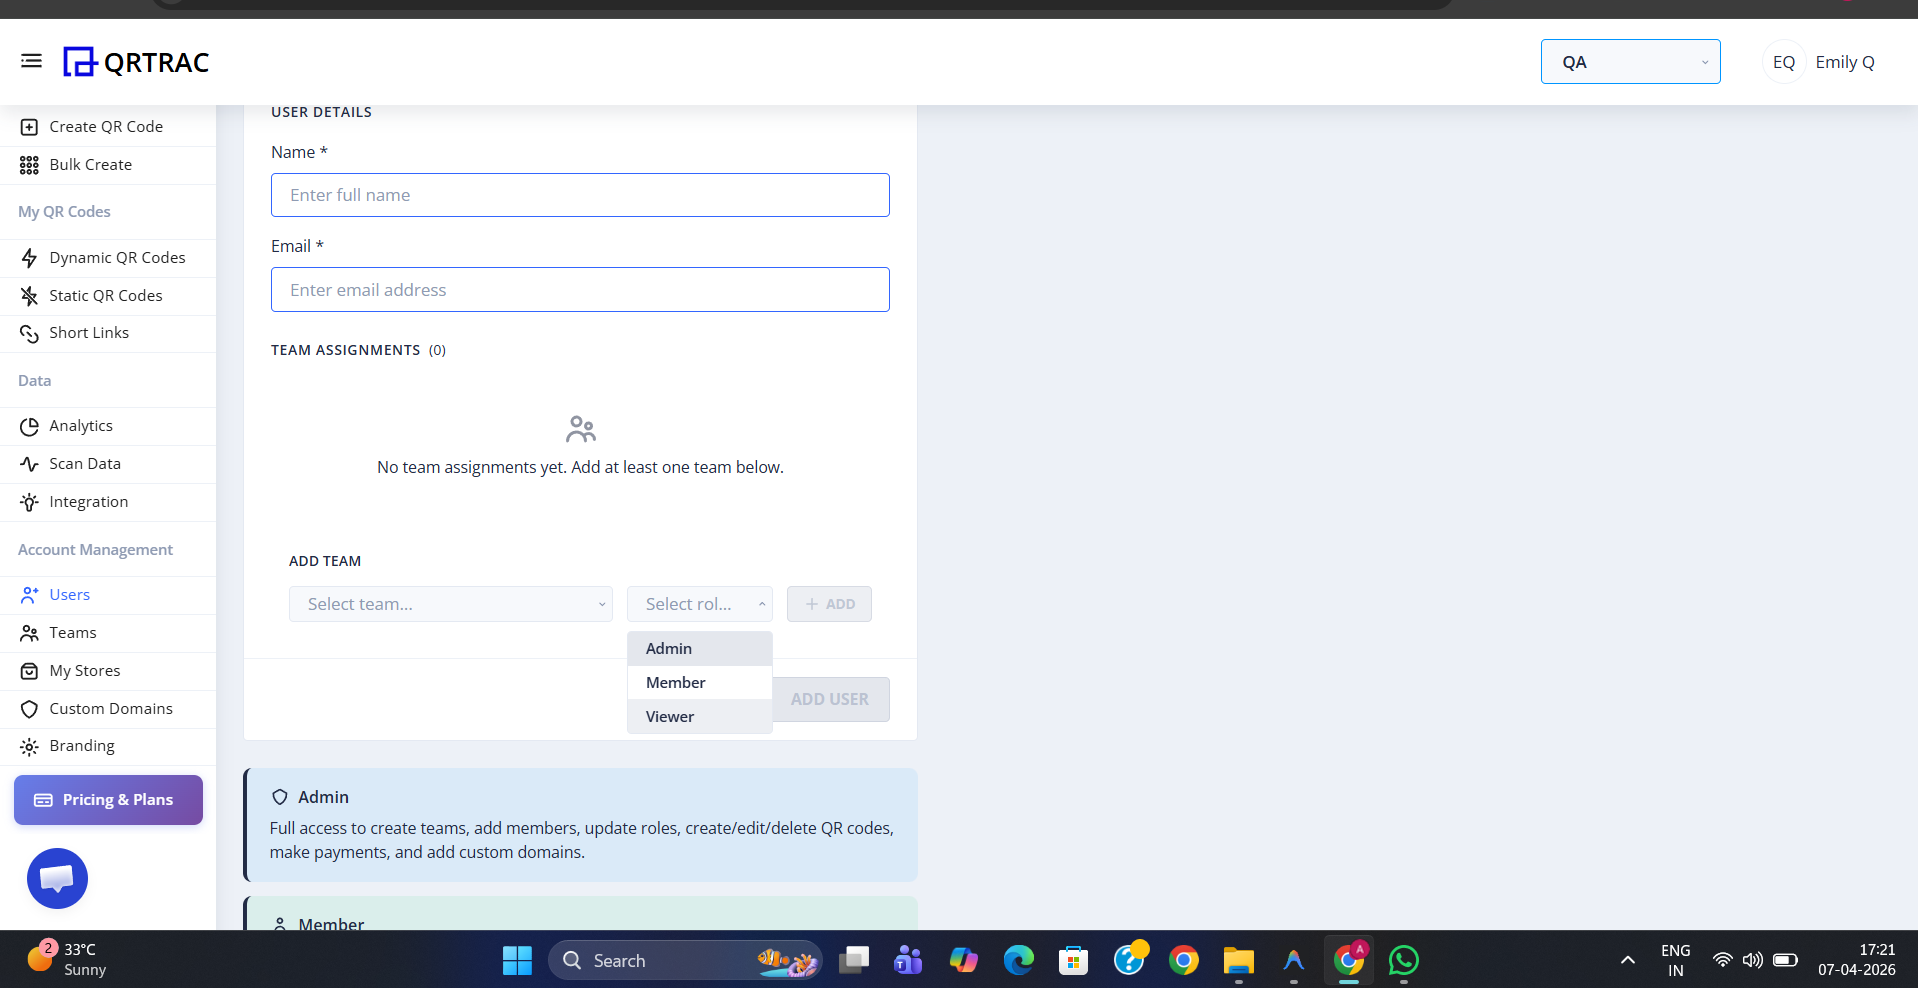
Role descriptions shown in the Add User panel — choose the right access level for each team member
Step 3: Add a New User
Click + Add User Fast in the top-right corner of the Users page. The Add New User panel slides open. Fill in the required fields:
- Name — the user's full name
- Email — their email address (they will use this to log in)
Once you have entered the details, click Save User to create the account. The new user will receive an invitation email to set up their password.
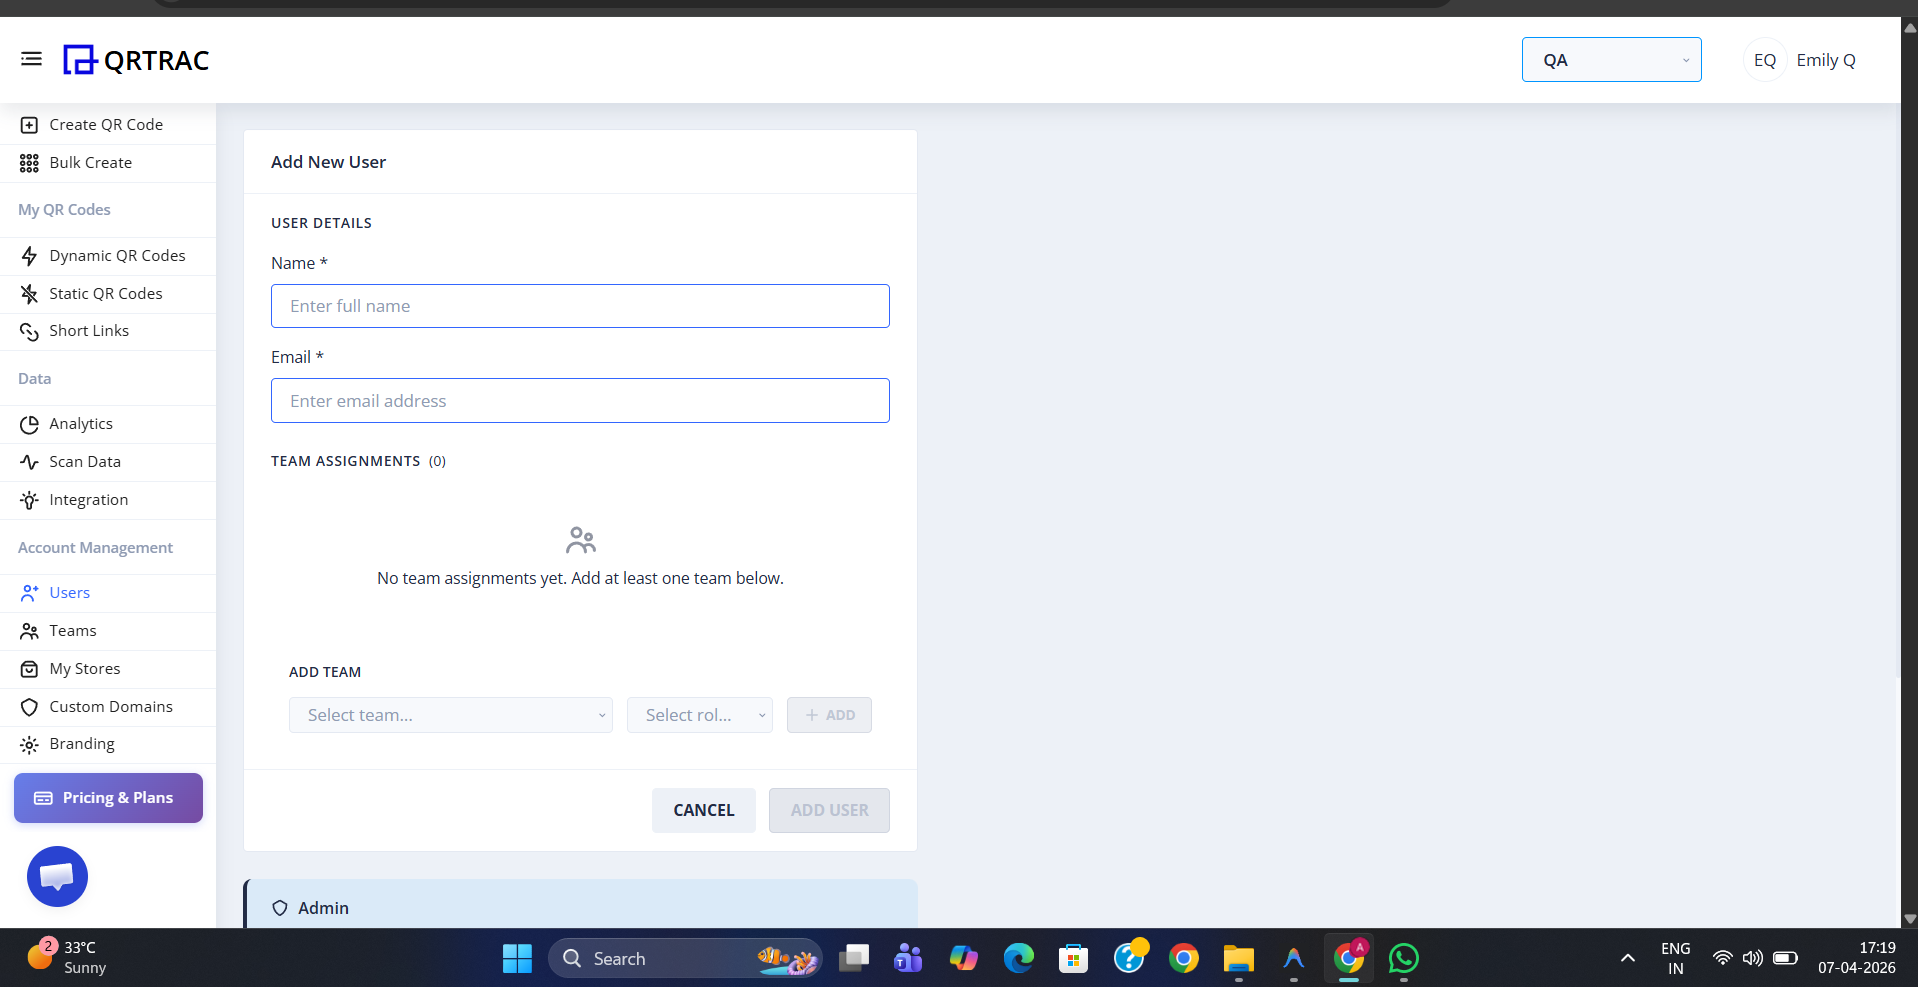
Fill in name and email, then click Save User to create the account
Step 4: Assign a Team to the User
Before saving, you can assign the new user to one or more teams using the Add Team section in the form. Select a team from the Select team dropdown, choose their role (Admin, Member, or Viewer), and click + Add. The team assignment will appear under Team Assignments.
You can add the user to multiple teams with different roles in each — for example, Admin in the Marketing team and Viewer in the Finance team.
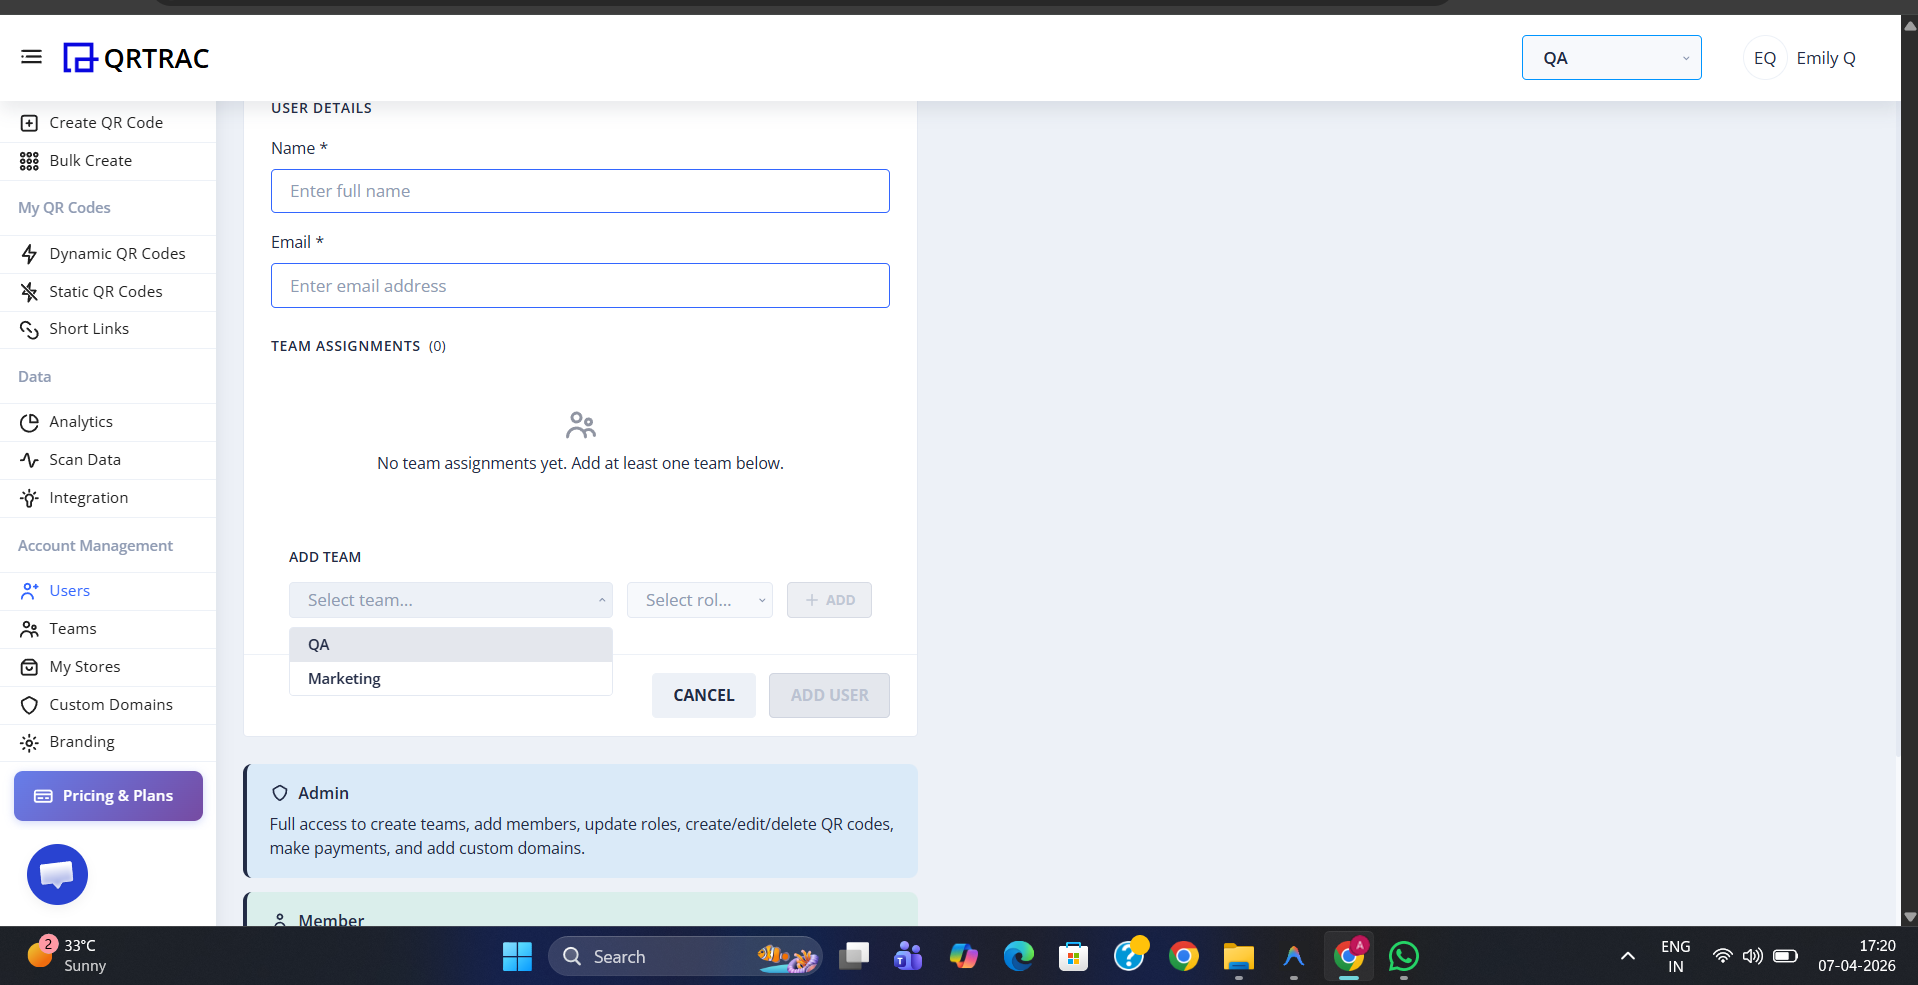
Select a team and role, click + Add to assign — repeat for multiple team assignments
Tip: You can also assign or change a user's team after they have been created. Click the edit icon next to any user on the Users page to open their profile and update their team assignments at any time.
User limits depend on your plan
The number of users you can add is determined by your subscription plan. You can view your current user allowance in Account Settings under the Usage section.